Checking the Blazons
The Digital Heraldry Research Environment provides a database and a set of tools to study, identify, and describe coats of arms in their historical contexts. Using heraldic terms and concepts, it enables the user to search for coats of arms or parts of them on a variety of historical objects. Thereby, it provides possible identifications for single coats of arms, but also facilitates historical research on heraldry as an object of visual, material, and cultural history.
The reserach environment is built on a Knowledge Graph, using the Digital Heraldry Ontology, which is created as part of the research project Coats of Arms in Practice, situated at the professorship of Digital History at Humboldt University of Berlin, Germany and funded by the Volkswagen Foundation.
Getting Started – Selecting a Coat of Arms for checking
When checking already existing blazons for coats of arms, the "Editing" function is used. After clicking on it, one can search for a specific object containing a CoA. This can be done by either looking up the full name, or the segment, a short usually three letter abbreviation for the object. In order to see the subobjects of the selected object, the button "Select" has to be clicked. For a manuscript the subobjects would be folios. This will then lead to an overview of all the subobjects with a preview of each page. Each subobject has its own name (i.e. 42r), two options for actions and either a red text reading "Blazon not verified" or a green one stating "Blazons verified". This last statement will only appear should the folio contain coats of arms which have all been verified. In order to verify the CoAs, on for example a folio, the check mark symbol needs to be clicked. This will lead to another page, where all the CoAs of this folio are displayed. It may be the case, that the folio contains coats of arms, as can be seen in the small preview image of the folio contents, but they do not appear on the page. If this is the case, skip this folio and continue on with the next. From this page, each Coat of Arm and its corresponding blazon can be selected for checking. In order to access the blazon, the field "Describe" needs to be clicked on. This will then redirect the user to a new page. Next to the image of the CoA, a selection can be made. This distinguishes between visual and textual representations. The option "Visual Representation" should already be preselected and should not be changed. Underneath that the different blazons are displayed. There should only be one option to choose from. The tag "Primary Blazon?" should be blank and "Steen-Clemmensen" should be noted as the creator. By selecting the option "Edit Blazon", the actual blazoning form will be opened.
Metadata for the Coat of Arms
Congratulations, you have now reached the actual blazoning form where all the work will be done. On the left there is an image of the CoA which will function as your comparison to the blazon. Only describe what is actually depicted on the image! The first few options are regarding the overall depiction of the coat of arms. The first descriptor is called "Is The Coat of Arms Represented As a Shield or Something Else?" and has the option "ShieldShapeRepresentation" automatically selected. This regards the way in which the CoA is displayed. Should it not be as a shield but for example on a banner, the corresponding option should be selected. The next field "Orientation Of The Shield" asks after the direction of the CoA. In the majority of cases, the option "UprightOrientation" needs to be selected. Should the entire shield be for example tilted on its side or upside down, the corresponding option needs to be selected. The following two descriptors are "Exterior Ornaments" and "Text Near Coat of Arms". Should the CoA have any exterior ornaments such as a Crest, Helmet or Mantling, the corresponding option needs to be selected. The "Text near Coat of Arms" field can be ignored. Lastly, this section contains the option "Is This The Primary Description Of The Coat Of Arms". This box needs to be clicked, otherwise the "Primary Blazon?" tag on the previous site will not be changed. This option verifies that the blazon described below has been checked and that this blazon is the main blazon for the CoA. This will be useful in case that multiple people disagree on what the CoA actually shows.
Field
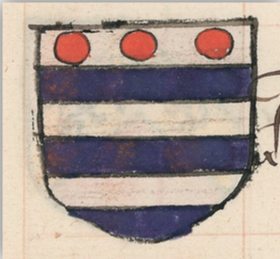
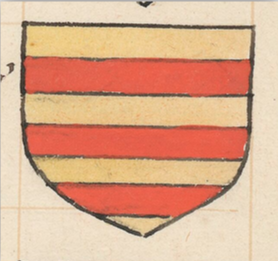
After clicking on the bar "Blazon" a further form will be expanded. The field "Original Blazon From OMA" is the first actual blazon encountered. It contains the textual blazon for this coat of arms following a system developed by Steen Clemmensen. It lists the charges as identified by Clemmensen and their tinctures (the colouring of the elements). The tinctures are abbreviated with one letter and follow the system Field, Charge 1, Charge 2, etc. Following this logic, the blazon "Cross A S" describes a black cross on a white field. For a further reaching explanations see http://www.armorial.dk/. The blazon is then formalised with the help of the all the following fields. It may be the case, that either the blazon is not correct to begin with or during the translation into the language of the ontology a mistake occurred. This needs to be corrected in the form itself. The blazon from OMA does not need to be changed. Furthermore, from time to time there will be no blazon to begin with. The field will then state "No Blazon in OMA" and the coat of arms should be skipped. The following field "Original ID From OMA" can be ignored as well. The first element of a coat of arms which is described, is the "Field", or the background of the coat of arms. Starting with the "Field Pattern", this option describes whether or not a pattern is present on the CoA. Should it just be a simple background without any pattern, the option "Plain" needs to be selected. Should the background be patterned though, the appropriate option needs to be selected. A Field is patterned when the reoccurring elements of the pattern begin and end with different colours. The blazon "Barruly of 6 AB" for example describes a pattern consisting of horizontal lines which begin at the top in white, then blue, then white again and so on and end in blue, as can be seen in the image (fig. 1). Should the first and last bar have the same colour, then it is not a pattern but a separate charge (Fig. 2). The adage "of 6" comes into play for the next field, the pattern number. This describes how many elements a pattern has. For the example "Barruly of 6", 6 lines in total are present, meaning 3 blue and 3 white. If the field has a plain pattern, the option "Pattern Number" is left blank.
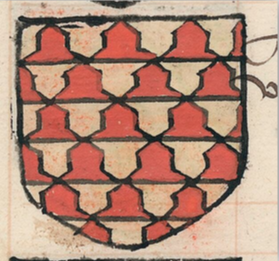
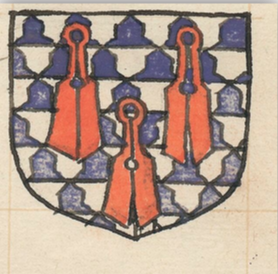
The following field "Tincture" describes, as already mentioned, the colour of the field. Here the tinctures are divided into: colours, consisting of blue (azure), red (gules), purple (Purpure), black (Sable), and green (Vert), furs, consisting of Ermine, Vair, VairNatural, and Vairy, metals, consisting of silver or white (Argent), and gold (or) and stains, only having the option orange (Tenne). The difference between Vair and Vairy is the following. While Vairy describes the same distinct pattern associated with the tincture vair, this option is used when the elements are not coloured blue and white (fig. 3). Vair on the other hand is only used to describe the blue and white variance (fig. 4). The last three options are "InOmbre" describing a charge only consisting of outlines (fig. 5), "Missing", used to describe an element which is not coloured (fig. 6), and lastly "Naturel", describing a charge which is not particularly coloured but rather depicting as it appears in nature (fig. 7).
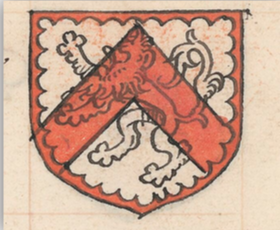
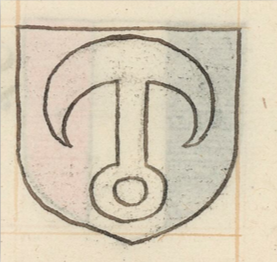
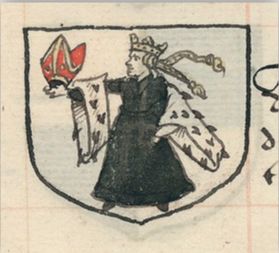
The Tinctures, like all other options, can be searched for by either typing at least 3 characters into the field or by browsing the hierarchical structure by clicking on the black tree diagram symbol on the right. Should a field or charge have multiple tinctures, additional tinctures can be added by clicking the option "+ Add hastincture2". The option "Line Style" is used when the outlines of the field elements are not straight. This can take many different forms such "Embattled", "Cotised", or "Engrailed" (fig. 8). Lastly the pattern of the field can have a different direction than usual. This can be described using the "Direction" field.
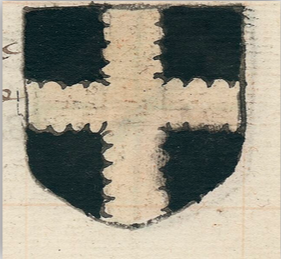
Marshalling
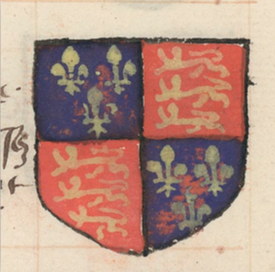
Should the coat of arms be marshalled, meaning that it is divided into different parts, each containing their own CoA, each CoA needs to be described separately (fig. 9).
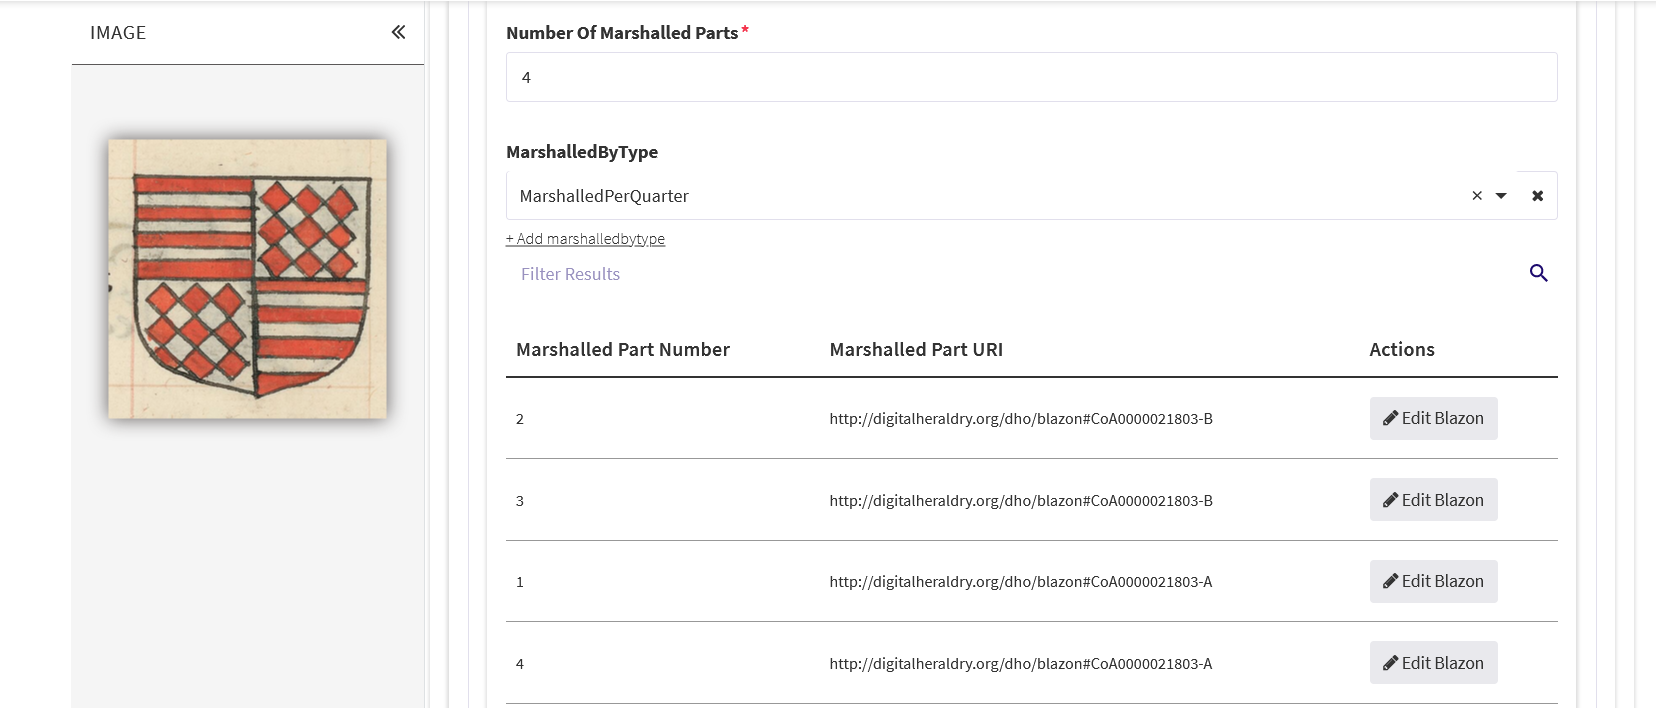
This is done using the marshalling function. Unfortunately, the feature to add one's own marshalling is currently not implemented, so one has to rely on the automatically generated partition selection. The field number of marshalled parts describes into how many sections the coat of arms is divided into. Should the Coat of Arms not have any marshalling, the field must be filled with out with a 1. Following is the partition method which describes in which manner the coat of arms is divided. Should these two fields be filled out correctly, one can describe each individual sub-section of the CoA by clicking on the "Add Marshalling" field. There the specific marshalled part can be chosen, which redirects onto a new form to blazon the Coat of Arms. Often times, two marshalled parts of one Coat of Arms will be identical. This is being accounted for, by linking the same blazon with different marshalled parts. Thusly, only one field of the two fields needs to be blazoned, because the second field will be linked automatically. Which parts are linked with each can be seen by looking at the Marshalled Part URI, which ends in a letter. If the letters are identical, the blazon will be the same (fig. 10). There is currently no option to change the URIs. Furthermore, the option to marshal an already marshalled part is also not available at the moment.
Layers and Charges
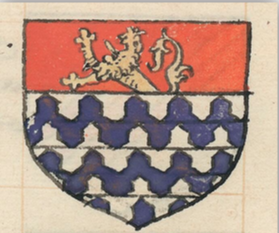
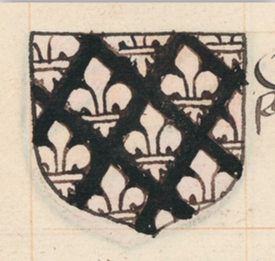
A charge describes one visually distinct figure or geometric form and a layer is used to group together charges which have a close visual and spatial relation to each other. For example, a crossier and a sword in saltire would be described as two separate charges on the same layer, where as a cross charged with a mullet (meaning that the mullet is placed on top of the cross) would be described as two charges on two different layers. This is done because the mullet and cross do not form a closely visually related item, whereas the crossier and sword do. Layers furthermore can describe the position between the different charges. If a charge is above another one, the layers are used distinguish which one is above the other. In the depicted CoA for example, the "Chief" charge is charged with a second charge, the naissant lion. In this case, the charge "chief" would be described on layer 1 and the lion on layer 2 (fig. 11). There is also the option to specify the spatial relation between the layers, which done via the according option underneath each layer. The same can be done for the spatial relations between different charges on the same layer. A common error within the automatic generation of the blazon occurs when there is "seme of" charge, meaning that the field is covered with small objects, spaced in a regular pattern (fig. 12).
Should there be multiple layers within the Coat of Arms, the blazon automatically adds the seme charge to every layer. This is not correct and the seme of charge needs to be placed on a separate (usually the first) layer and removed from the other layers. Each charge is identified by using the "displayed charge" option. Usually, the blazon from OMA provides a reliable guideline of what is displayed. Should there be any uncertainty about whether or not the Charge is identified correctly, a simple google search with the name of the charge often helps. There are great resources online for the identification of heraldic elements. The charge is then further described. The number of the charge is given by the corresponding field with the option to further concretize the number of charges, should there be multiple of the same element. As for the charge pattern, the procedure is the same as for the field pattern. However, the charges can be further described using additional attributes and modifiers. The additional attributes are as following: Direction (if the charge is turned or pointed into a specific direction), the arrangement (the specific placement on the shield such as two on top one on the bottom (2:1) or in saltire, and the direction of the arrangement) (fig. 13), the line style (same as with the line style for the field), position on shield (where the charge is placed on the shield such as in chief, or dextra), and finally displayed letter and displayed text. The applicable fields should be filled out.
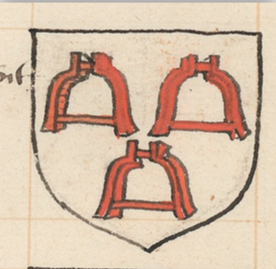
The modifiers are used to provide any additional information about visual variations and attitudes of the charge displayed. This is the place where information such as "rampant", "armed", or "pierced" is provided. Some modifiers may also have a distinct tincture which can be added in the corresponding field. The modifiers should be as detailed as possible and the automatic blazon often misses certain aspects. It takes some time to figure out the ins and outs of these fields and to figure out, what each element describes and how they are called. Once again, a quick google search answers a lot of initial questions (fig. 14).
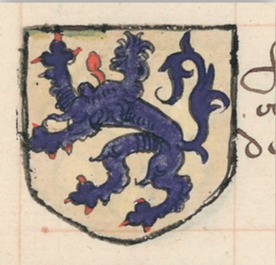
Another known bug occurs when a charge is arranged as an "orle of". Here the Research environment automatically selects both "Single Charge" and "Multiple Charge", which cannot be manually unselected. In order to fix this, just delete the layer and add it manually. Each charge also has the possible descriptor "Charged with Coats of Arms", referring to the case of a separate CoA being displayed on top of the bigger CoA. Unfortunately, this feature is still in development and cannot be used at this point in time. Coats of arms where this variation occurs in should be skipped when blazoning for now.
Saving the Blazon
Once the entire Coat of Arms is correctly described, click the "Save" button on the bottom. Unless the Blazon is saved, all the changes will be lost. Should there be any further questions, new bugs or uncertainties during the blazoning, feel free to get in contact with us via e-mail under heraldry.ifg@hu-berlin.de.
Image References
Figure 1: Paris, Bibliothèque nationale de France. Département des Manuscrits, Français 5232, fol. 401v.
Figure 2: Paris, Bibliothèque nationale de France. Département des Manuscrits, Français 5232, fol. 379r.
Figure 3: Paris, Bibliothèque nationale de France. Département des Manuscrits, Français 5232, fol. 42r.
Figure 4: Paris, Bibliothèque nationale de France. Département des Manuscrits, Français 5232, fol. 379r.
Figure 5: Paris, Bibliothèque nationale de France. Département des Manuscrits, Français 5232, fol. 210r.
Figure 6: Paris, Bibliothèque nationale de France. Département des Manuscrits, Français 5232, fol. 451r.
Figure 7: Paris, Bibliothèque nationale de France. Département des Manuscrits, Français 5232, fol. 436v.
Figure 8: Paris, Bibliothèque nationale de France. Département des Manuscrits, Français 5232, fol. 400r.
Figure 9: Paris, Bibliothèque nationale de France. Département des Manuscrits, Français 5232, fol. 399r.
Figure 11: Paris, Bibliothèque nationale de France. Département des Manuscrits, Français 5232, fol. 378r.
Figure 12: Paris, Bibliothèque nationale de France. Département des Manuscrits, Français 5232, fol. 377v.
Figure 13: Paris, Bibliothèque nationale de France. Département des Manuscrits, Français 5232, fol. 379r.
Figure 14: Paris, Bibliothèque nationale de France. Département des Manuscrits, Français 5232, fol. 402v.